Installation réussie de la version commerciale 1.01 de HP Helion OpenStack – Installation de base KVM
2015-01-14

Machine-translated from English. Read the English original
Installation de la version commerciale HOS 1.01 à l'aide de 8 serveurs physiques – Notes
Inventaire des serveurs
| Rôle | Numéro de série | IP ILO | Nom d'utilisateur ILO | Mot de passe ILO | Adresse IP | CPU | Mémoire | Disque |
| Hôte Seed | ILOCZJ43402GV | 172.30.0.117 | Administrator | xxxx | 172.16.120.2 | 20 | 262144 | 1116 |
| Undercloud | ILOCZJ43402GW | 172.30.0.118 | Administrator | xxxx | 20 | 262144 | 1116 | |
| Overcloud MC | ILOCZJ43402H5 | 172.30.0.119 | Administrator | xxxx | 20 | 262144 | 1116 | |
| Overcloud Ctrl1 | ILOCZJ43402H0 | 172.30.0.120 | Administrator | xxxx | 20 | 262144 | 1116 | |
| Overcloud Ctrl2 | ILOCZJ43402GX | 172.30.0.121 | Administrator | xxxx | 20 | 262144 | 1116 | |
| Overcloud Swift1 | ILOCZJ43402H2 | 172.30.0.122 | Administrator | xxxx | 20 | 262144 | 1116 | |
| Overcloud Swift2 | ILOCZJ43402H3 | 172.30.0.123 | Administrator | xxxx | 20 | 262144 | 1116 | |
| Overcloud Compute | ILOCZJ43402HC | 172.30.0.124 | Administrator | xxxx | 20 | 262144 | 1116 |
Networking

Réseaux
- Management 172.16.120.0/24 VLAN 120 (Untagged – Native)
- External (Public) 172.16.122.0/24 VLAN 122 (Tagged)
- Service 172.16.121.0/24 VLAN 121 (Tagged)
- IPMI (iLO) 172.30.0.0/24 (Untagged – Native)
Prérequis
On suppose que les serveurs ont déjà été installés en rack, empilés et câblés aux commutateurs de bout de rack.
Matériel
- Le matériel de base est-il pris en charge – vérifiez-le par rapport à la matrice de support ou potentiellement à l'avenir en utilisant l'outil de découverte USB ? (Contrôleurs RAID, etc.)
iLO
- Cela devra être configuré avec une adresse IP, un nom d'utilisateur administratif et un mot de passe.
- Appliquez la licence iLO si des fonctionnalités iLO avancées sont requises (par exemple, l'accès à la console distante une fois le système d'exploitation démarré)

Paramètres du Bios
- Réglez correctement la date et l'heure de l'horloge en temps réel (RTC).
- Désactivez le démarrage PXE sur toutes les cartes réseau SAUF la carte réseau de gestion physique (iLO requis également)
- Activez la technologie de virtualisation CPU
- Réglez le redémarrage automatique sur Désactivé

Contrôleur RAID
- Configurez le tableau de stockage local pour présenter un seul disque raid 1/0
[ Modifier selon vos préférences – OpenStack recommande d'éviter les contrôleurs RAID pour réduire les coûts et la complexité. Cependant, les entreprises préfèrent généralement la redondance pour éviter que des pannes banales n'affectent la production. ]

Début du processus d'installation
- Connectez-vous à l'iLO du seedhost et montez l'iso du serveur ubuntu14.04

- Installez Ubuntu Server

[Note : paramètres spécifiques de l'environnement de laboratoire local proxy pour le référentiel de paquets ubuntu]
- modifiez ou créez le fichier de configuration suivant et ajoutez les détails du proxy – /etc/apt/apt.conf
- Acquire::http::Proxy “http://XX.XXX.133.239:3128“;
- enregistrer
- Actualiser le contenu du référentiel
-
sudo apt-get update
- Configurez DNS via l'interface appropriée dans /etc/network/interface
par exemple.
L'interface réseau principale
auto em1
iface em1 inet static
address 172.16.120.2
netmask 255.255.255.0
network 172.16.120.0
broadcast 172.16.120.255
gateway 172.16.120.1
# les options dns-* sont implémentées par le package resolvconf, s'il est installé
dns-nameservers 172.16.120.1
- Configurez SSH [déjà installé lors de l'installation de base]
- Obtenez la clé publique
-
ssh-keygen -t rsa -N “”
helion@headnode03r03:~$ sudo su –
[sudo] password for helion:
root@headnode03r03:~# ssh-keygen -t rsa -N “”
Generating public/private rsa key pair.
Enter file in which to save the key (/root/.ssh/id_rsa):
Created directory ‘/root/.ssh’.
Your identification has been saved in /root/.ssh/id_rsa.
Your public key has been saved in /root/.ssh/id_rsa.pub.
The key fingerprint is:
20:51:98:0d:48:ab:b8:fa:ca:3b:a3:25:03:ff:31:2b root@headnode03r03
The key’s randomart image is:
+–[ RSA 2048]—-+
| …o*. |
| ..o.. |
| . . . |
|.. . . |
|+ S |
|.o |
|+ o o |
|o*E. + |
|===.o |
+—————–+
root@headnode03r03:~#
-
Installez les paquets prérequis comme documenté ici
-
sudo apt–get install –y xrdp xfce4 libvirt–bin openvswitch–switch openvswitch–common python–libvirt qemu–kvm libssl–dev libffi–dev virt–manager chromium–browser
-
Redémarrez libvirt
-
sudo /etc/init.d/libvirt–bin restart
-
Installez et configurez le serveur NTP
- sudo apt-get install ntp
- Pour les scénarios PoC ou lorsqu'il n'y a pas d'accès à un serveur NTP externe, utilisez cet hôte seed comme serveur NTP en modifiant le /etc/ntp.conf avec les détails suivants
Spécifiez un ou plusieurs serveurs NTP.
Utilisez des serveurs du projet NTP Pool. Approuvé par le Conseil technique d'Ubuntu
le 2011-02-08 (LP: #104525). Voir http://www.pool.ntp.org/join.html pour
plus d'informations.
server 127.127.1.0
fudge 127.127.1.0 stratum 10
- service ntp restart

- Copiez les binaires HOS et les outils d'installation depuis le serveur http dans le laboratoire.
- root@headnode03r03:~# mkdir work
- root@headnode03r03:~# cd work
- root@headnode03r03:~/work# wget http://172.16.1.5/files/helion/enterprise/HP_Helion_OpenStack_1.0.1.tgz
–2015-01-09 14:52:32– http://172.16.1.5/files/helion/enterprise/HP_Helion_OpenStack_1.0.1.tgz
Connecting to 172.16.1.5:80… connected.
HTTP request sent, awaiting response… 200 OK
Length: 7440363802 (6.9G) [application/octet-stream]
Saving to: ‘HP_Helion_OpenStack_1.0.1.tgz’
100%[====================================>] 7,440,363,802 276MB/s in 26s
2015-01-09 14:52:58 (277 MB/s) – ‘HP_Helion_OpenStack_1.0.1.tgz’ saved [7440363802/7440363802]
- Vérifiez le support d'installation
- root@headnode03r03:~/work# md5sum HP_Helion_OpenStack_1.0.1.tgz
b341aac3ff2f4c583f3ca22e6a2f1e1a HP_Helion_OpenStack_1.0.1.tgz
- Téléchargez tous les fichiers de support depuis le répertoire d'outils dans les laboratoires [pour les grandes installations, ces outils feront gagner beaucoup de temps pour obtenir des informations depuis les iLO]
- root@headnode03r03:~/work# wget -r -nd -nH –no-parent –reject “index.html*” http://172.16.1.5/files/helion/tools/
–2015-01-09 15:07:06– http://172.16.1.5/files/helion/tools/
Connecting to 172.16.1.5:80… connected.
HTTP request sent, awaiting response… 200 OK
Length: unspecified [text/html]
Saving to: ‘index.html’
[ <=> ] 414 –.-K/s in 0s
2015-01-09 15:07:06 (19.8 MB/s) – ‘index.html’ saved [414]
Loading robots.txt; please ignore errors.
–2015-01-09 15:07:06– http://172.16.1.5/robots.txt
Reusing existing connection to 172.16.1.5:80.
HTTP request sent, awaiting response… 404 Not Found
2015-01-09 15:07:06 ERROR 404: Not Found.
Removing index.html since it should be rejected.
–2015-01-09 15:07:06– http://172.16.1.5/files/helion/tools/Create-Baremetal.py
Reusing existing connection to 172.16.1.5:80.
HTTP request sent, awaiting response… 200 OK
Length: 4829 (4.7K) [application/octet-stream]
Saving to: ‘Create-Baremetal.py’
100%[======================================>] 4,829 –.-K/s in 0s
2015-01-09 15:07:06 (280 MB/s) – ‘Create-Baremetal.py’ saved [4829/4829]
–2015-01-09 15:07:06– http://172.16.1.5/files/helion/tools/python-hpilo-2.8.tar
Reusing existing connection to 172.16.1.5:80.
HTTP request sent, awaiting response… 200 OK
Length: 204800 (200K) [application/octet-stream]
Saving to: ‘python-hpilo-2.8.tar’
100%[======================================>] 204,800 –.-K/s in 0.001s
2015-01-09 15:07:06 (207 MB/s) – ‘python-hpilo-2.8.tar’ saved [204800/204800]
FINISHED –2015-01-09 15:07:06–
Total wall clock time: 0.006s
Downloaded: 3 files, 205K in 0.001s (205 MB/s)
root@headnode03r03:~/work# ls
Create-Baremetal.py HP_Helion_OpenStack_1.0.1.tgz python-hpilo-2.8.tar
- Installez les bibliothèques python HP iLO
- root@headnode03r03:~/work# tar -xvf python-hpilo-2.8.tar
- root@headnode03r03:~/work# cd python-hpilo-2.8/
- root@headnode03r03:~/work/python-hpilo-2.8# python3 setup.py install
- Extrayez les binaires HOS
- root@headnode03r03:~/work# tar zxvf /root/work/HP_Helion_OpenStack_1.0.1.tgz
[Note de mise à jour : J'ai dû tout copier dans le répertoire racine car il y avait des problèmes avec le script d'installation lorsque j'avais placé les fichiers dans le répertoire work]
- Sauvegardez puis modifiez le fichier par défaut des variables d'environnement d'installation /root/work/tripleo/config/kvm-custom-ips.json
- root@headnode03r03:~/work# vi /root/work/tripleo/configs/kvm-custom-ips.json
-
root@headnode03r03:~/work# cat /root/work/tripleo/configs/kvm-custom-ips.json
{
“cloud_type”: “KVM”,
“vsa_scale”: 0,
“vsa_ao_scale”: 0,
“so_swift_storage_scale”: 0,
“so_swift_proxy_scale”: 0,
“compute_scale”: 1,
“bridge_interface”: “em1”,
“virtual_interface”: “eth0”,
“fixed_range_cidr”: “172.0.100.0/24”,
“control_virtual_router_id”: “71”,
“baremetal”: {
“network_seed_ip”: “172.16.120.3”,
“network_cidr”: “172.16.120.0/24”,
“network_gateway”: “172.16.120.1”,
“network_seed_range_start”: “172.16.120.4”,
“network_seed_range_end”: “172.16.120.14”,
“network_undercloud_range_start”: “172.16.120.20”,
“network_undercloud_range_end”: “172.16.120.40”
},
“neutron”: {
“public_interface_raw_device”: “eth0”,
“overcloud_public_interface”: “vlan122”,
“undercloud_public_interface”: “eth0”
},
“ntp”: {
“overcloud_server”: “172.16.120.2”,
“undercloud_server”: “172.16.120.2”
},
“floating_ip”: {
“start”: “172.16.122.100”,
“end”: “172.16.122.150”,
“cidr”: “172.16.122.0/24”
},
“svc”: {
“interface”: “vlan121”,
“interface_default_route”: “172.16.121.1”,
“allocate_start”: “172.16.121.100”,
“allocate_end”: “172.16.121.200”,
“allocate_cidr”: “172.16.121.0/24”,
“overcloud_bridge_mappings”: “svcnet1:br-svc”,
“overcloud_flat_networks”: “svcnet1”,
“customer_router_ip”: “172.16.121.1”
},
“codn”: {
“undercloud_http_proxy”: “http://16.209.133.239:3128”,
“undercloud_https_proxy”: “http://16.209.133.239:3128”,
“overcloud_http_proxy”: “http://16.209.133.239:3128”,
“overcloud_https_proxy”: “http://16.209.133.239:3128”
}
}
-
Créez maintenant le fichier baremetal.csv en utilisant les outils téléchargés précédemment. [Note : N'incluez pas l'hôte seed dans ce fichier.]
- Le fichier Create-Baremetal.py nécessite un fichier CSV avec les détails iLO
- root@headnode03r03:~/work/python-hpilo-2.8# cd ..
- root@headnode03r03:~/work# python3 Create-Baremetal.py
usage: Create-Baremetal.py [-h] [-f FILE]
Create-Baremetal.py: error: argument -f/–file: can’t open ‘Helion-iLO.csv’: [Errno 2] No such file or directory: ‘Helion-iLO.csv’
- Créez le fichier CSV au format suivant
help=’CSV with iLO IP, username, password’, default=’Helion-iLO.csv’
-
Par exemple :
root@headnode03r03:~/work# vi Helion-iLO.csv
root@headnode03r03:~/work# cat Helion-iLO.csv
172.30.0.117,Administrator,xxxx [Note : Supprimer l'hôte Seed]
172.30.0.118,Administrator,xxxx
172.30.0.119,Administrator,xxxx
172.30.0.120,Administrator,xxxx
172.30.0.121,Administrator,xxxx
172.30.0.122,Administrator,xxxx
172.30.0.123,Administrator,xxxx
172.30.0.124,Administrator,xxxx
-
Créez le fichier baremetal.csv
-
root@headnode03r03:~/work# python3 Create-Baremetal.py
Creating baremetal.csv in the current folder…
Gathering information for node: 172.30.0.117 PXE-Mac:9c:b6:54:9b:e4:68, 262144MB, 20 Cores, 1116GiB
Gathering information for node: 172.30.0.118 PXE-Mac:9c:b6:54:9b:94:48, 262144MB, 20 Cores, 1116GiB
Gathering information for node: 172.30.0.119 PXE-Mac:9c:b6:54:9b:b6:98, 262144MB, 20 Cores, 1116GiB
Gathering information for node: 172.30.0.120 PXE-Mac:9c:b6:54:9b:76:90, 262144MB, 20 Cores, 1116GiB
Gathering information for node: 172.30.0.121 PXE-Mac:9c:b6:54:9b:f6:78, 262144MB, 20 Cores, 1116GiB
Gathering information for node: 172.30.0.122 PXE-Mac:f0:92:1c:05:49:30, 262144MB, 20 Cores, 1116GiB
Gathering information for node: 172.30.0.123 PXE-Mac:9c:b6:54:9b:64:00, 262144MB, 20 Cores, 1116GiB
Gathering information for node: 172.30.0.124 PXE-Mac:9c:b6:54:9b:d6:78, 262144MB, 20 Cores, 1116GiB
root@headnode03r03:~/work# cat baremetal.csv
9c:b6:54:9b:94:48,Administrator,xxxx,172.30.0.118,20,262144,1116
9c:b6:54:9b:b6:98,Administrator,xxxx,172.30.0.119,20,262144,1116
9c:b6:54:9b:76:90,Administrator,xxxx,172.30.0.120,20,262144,1116
9c:b6:54:9b:f6:78,Administrator,xxxx,172.30.0.121,20,262144,1116
f0:92:1c:05:49:30,Administrator,xxxx,172.30.0.122,20,262144,1116
9c:b6:54:9b:64:00,Administrator,xxxx,172.30.0.123,20,262144,1116
9c:b6:54:9b:d6:78,Administrator,xxxx,172.30.0.124,20,262144,1116
-
Configurez le proxy http sur l'hôte seed
- root@headnode03r03:~/work# export http_proxy=http://16.209.133.239:3128
- root@headnode03r03:~/work# export https_proxy=http://16.209.133.239:3128
- root@headnode03r03:~/work# export no_proxy=localhost,127.0.0.1,172.12.120.2
- Exécutez le kvm-custom-ips
- root@headnode03r03:~# bash
- root@headnode03r03:~# source tripleo/tripleo-incubator/scripts/hp_ced_load_confi g.sh tripleo/configs/kvm-custom-ips.json
The configuration specified by tripleo/configs/kvm-custom-ips.json is loaded and ready for installation
- Construisez la VM seed
- root@headnode03r03:~# bash -x /root/tripleo/tripleo-incubator/scripts/hp_ced_host_manager.sh –create-seed |& tee seedinstall.log
Seed terminé – maintenant pour undercloud et over cloud
- Copiez le fichier baremetal.csv précédemment créé dans la nouvelle VM seed
-
scp baremetal.csv root@172.16.120.3:/root
-
Connectez-vous à la nouvelle VM seed
-
ssh root@172.16.120.3
-
Vérifiez que le fichier baremetal et le kvm-custom-ips.json sont corrects
- Exécutez le fichier kvm-custom-ips.json
-
source tripleo/tripleo-incubator/scripts/hp_ced_load_config.sh tripleo/configs/kvm-custom-ips.json
-
Installez l'undercloud et l'overcloud
- bash -x /root/tripleo/tripleo-incubator/scripts/hp_ced_installer.sh |& tee cloud_install.log
- Et cela devrait vous donner –
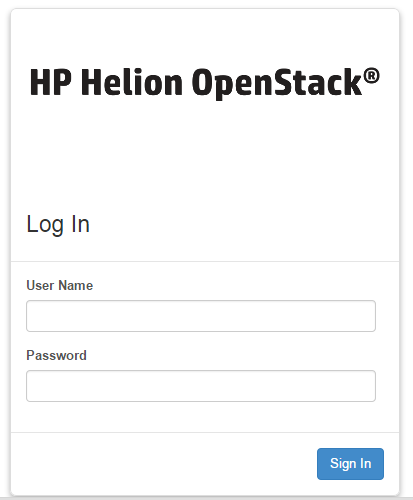
Article à venir pour la vérification de l'installation
Erreurs
Problème :
=======
root@headnode03r03:~# source /root/work/tripleo/tripleo-incubator/scripts/hp_ced_load_config.sh /root/work/tripleo/configs/kvm-custom-ips.json
Error: Script has no access to write variables to environment.
You must run this using one of the following forms:
source hp_ced_load_config.sh <config.json>
or
. hp_ced_load_config.sh <config.json>
Solved : Ensure you’re in a bash shell - run bash and then run the command
=======================================================
Problème :
=======
root@headnode03r03:~# source /root/work/tripleo/tripleo-incubator/scripts/hp_ced_load_config.sh /root/work/tripleo/configs/kvm-custom-ips.json
Error: [Errno 2] No such file or directory: '/root/tripleo/hp_passthrough/overcloud_pre_installer.json'
Solved : Ensure the media is installed in the correct installed in the /root/ directory. Early documentation requests that the media is expanded into a /root/work/ directory. This is no longer correct.
root@headnode03r03:~# mv work/tripleo/ /root/
=============================================================
Problème :
=======
+ hp_ced_validate_ip validate -a 172.16.120.3 -n 172.16.120.0/24 -p down
Valid IP address: 172.16.120.3
Address (172.16.120.3) on network (172.16.120.0/24)
ERROR: Found pingable IP, cannot continue
Pingable IP: 172.16.120.3
Solved : All servers not switched off - ensure lab is reset correctly before starting
=============================================================
Problème :
=======
+ die 'Error: BRIDGE_INTERFACE:eth0 has no assigned IP address'
+ echo Error: BRIDGE_INTERFACE:eth0 has no assigned IP address
Error: BRIDGE_INTERFACE:eth0 has no assigned IP address
+ exit 1
Solved : The seed host was not reset cleanly after first attempt - need to remove the baremetal bridge - brbm and place ip address back on em1…
Deleted brbm
Added IP back to em1
Added default gw
=====================================================================
Originally published on allthingscloud.eu (2015-01-14).